This post provides a step-by-step guide on how you can create this blog powered by Hugo, configure Github Actions to publish to Github Pages, and link custom domain to your Github Pages.
This guide is also available on Youtube here.
Set up Hugo
Install Hugo and Create a New Site
brew install hugo
hugo new site theplaybook -f yml
- Install Hugo with Homebrew
- Run
hugo new site <site_name>. This will create a directory<site_name>containing the hugo templates. Pass in the optional-f ymloption to override the default toml files used for configuration. Refer to the hugo doc
baseurl:
- Leave the baseurl in config.yml empty for now
Create a new page
hugo new docs/test.md
- Create a new page with
hugo new <filename> - Open the test.md file and set
draft: false; otherwise the page will not render - Add random content in the test.md file
- You can run
hugo serverto run the application locally onlocalhost:1313but it might throw a layout error at the moment without any theme
Install theme
git init
git clone https://github.com/adityatelange/hugo-PaperMod themes/PaperMod --depth=1
git submodule add --depth=1 https://github.com/adityatelange/hugo-PaperMod.git themes/PaperMod
- Run
git initon the root of the project to initialize a Git repository - We will install the PaperMod theme. Use the two commands above from the instructions here
- Or choose a theme from the hugo themes
theme: PaperMod
- Add
theme: PaperModto your config.yml
Configure Github Actions to Publish to the Github Pages
Create a Git repository and initialize Git
echo "# README" >> README.md
git add README.md
git commit -m "first commit"
git branch -M main
git remote add origin <path_to_your_git_repo>
git push -u origin main
- Create a repository on Github, create a readme file, add the remote address, and push your first commit
Manually Add the gh-pages Branch
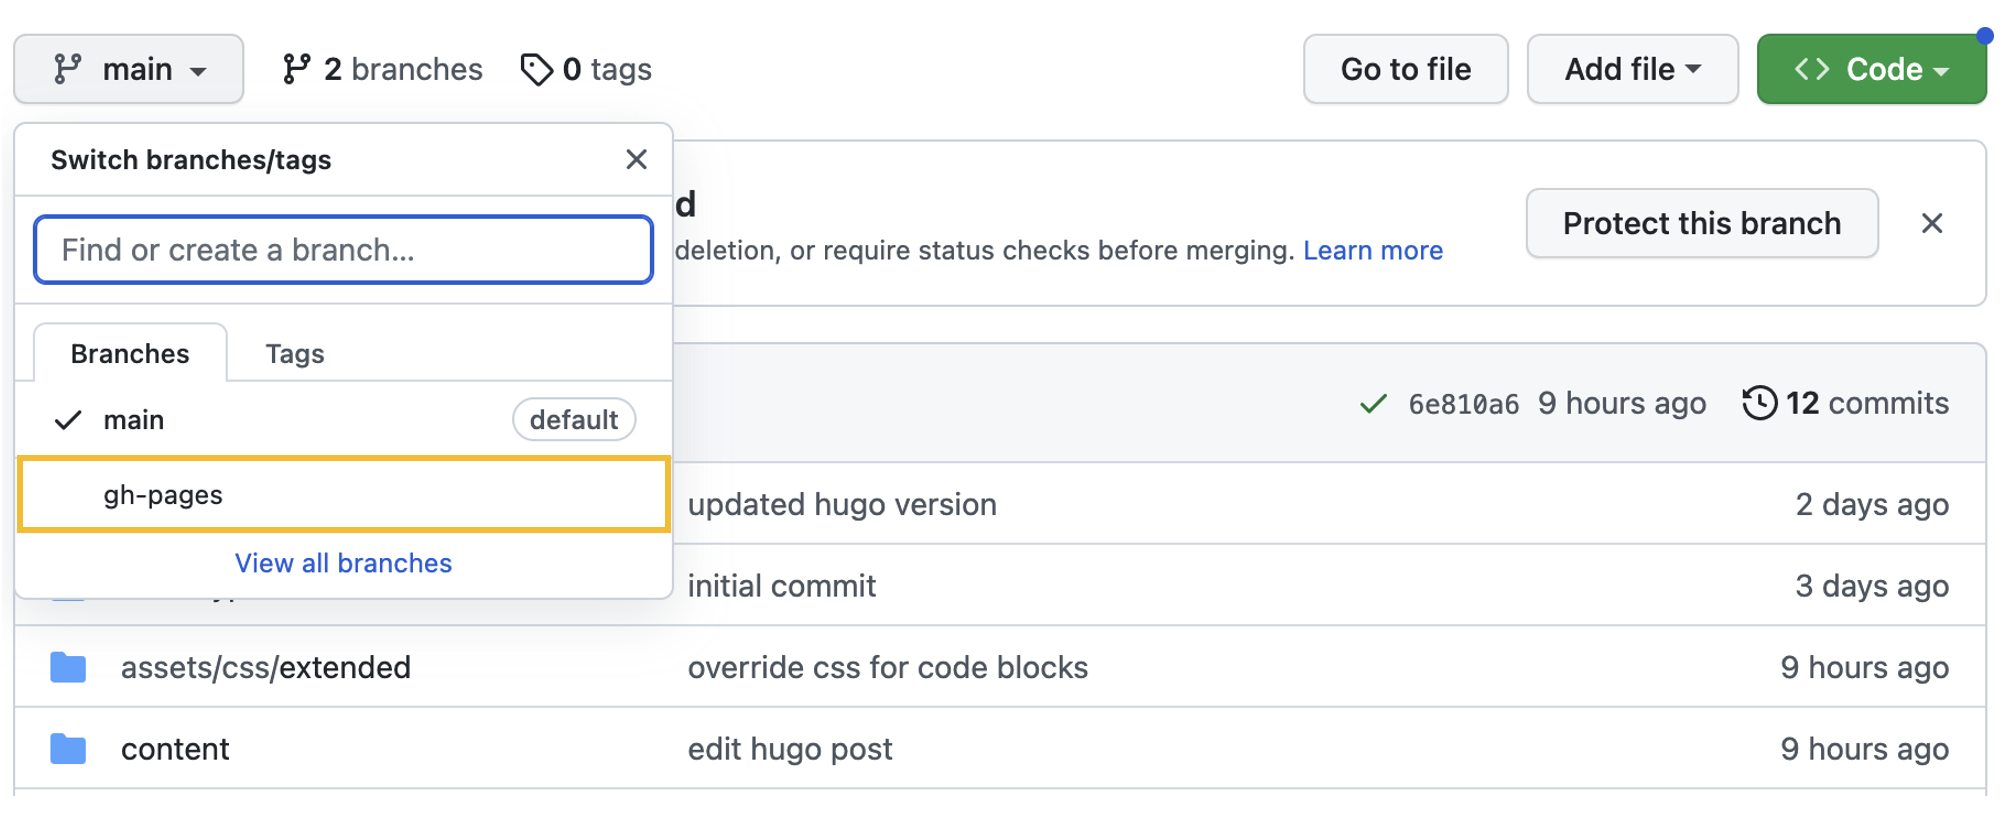
- Manually add the gh-pages branch to the repository; otherwise the github actions will throw an error
Allow Read and Write Permissions on the Workflow
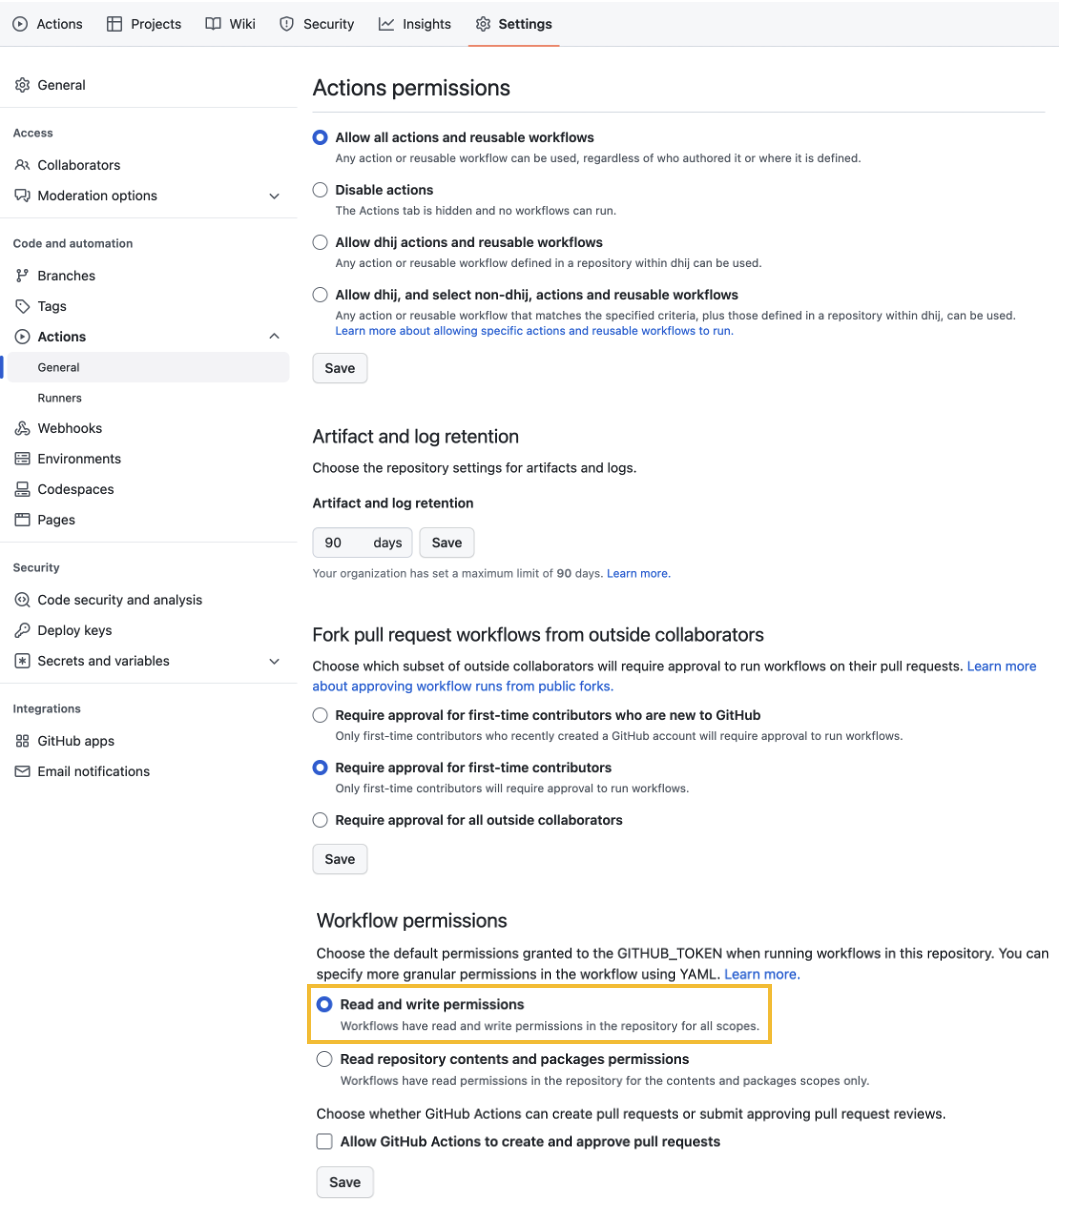
- Allow read and write permissions under Settings > Actions > General > Workflow permissions
Add a .github/workflows/deploy.yml file under the project root directory
name: Publish to GH Pages
on:
  push:
    branches:
      - main
  pull_request:

jobs:
  deploy:
    runs-on: ubuntu-latest
    steps:
      - name: Checkout source
        uses: actions/checkout@v3
        with:
          submodules: true

      - name: Checkout destination
        uses: actions/checkout@v3
        if: github.ref == 'refs/heads/main'
        with:
          ref: gh-pages
          path: built-site

      - name: Setup Hugo
        run: |
          curl -L -o /tmp/hugo.tar.gz 'https://github.com/gohugoio/hugo/releases/download/v0.110.0/hugo_extended_0.110.0_linux-amd64.tar.gz'
          tar -C ${RUNNER_TEMP} -zxvf /tmp/hugo.tar.gz hugo
      - name: Build
        run: ${RUNNER_TEMP}/hugo

      - name: Deploy
        if: github.ref == 'refs/heads/main'
        run: |
          cp -R public/* ${GITHUB_WORKSPACE}/built-site/
          cd ${GITHUB_WORKSPACE}/built-site
          git add .
          git config user.name 'dhij'
          git config user.email 'davidhwang.ij@gmail.com'
          git commit -m 'Updated site'
          git push
- The first step checks out my repository under
$GITHUB_WORKSPACEandsubmodules:trueensures that our submodule for the theme repository is fetched as well - The second step allows us to reference the
gh-pagesbranch via the$GITHUB_WORKSPACE/built-sitedirectory, where our static sites will be stored in (Refer to theDeploystep) - The third and fourth steps involve installing hugo and building the static pages in the
publicdirectory with thehugocommand - The last step copies the static sites into
${GITHUB_WORKSPACE}/built-siteand pushes the changes to the referenced branchgh-pages, which is a special branch that Github recognizes and uses to publish to your Github Pages site
Note: the content will be deployed to https://<username>.github.io/<repository_name>/ by default if not configured otherwise. Update the base_url in config.yml to "https://<username>.github.io/<repository_name>/"
Link Custom Domain to Github Pages

- Add your custom domain under your Git repository’s Settings > Pages > Custom Domain as shown in the image above.
Note: the DNS check will initially be unsuccessful

- Configure an apex domain by adding IP addresses for Github Pages as instructed here. As recommended there, set up a
wwwsubdomain as well by creating a CNAME record that points to<username>.github.io. If you are using Namecheap, you will have records that look something like the image above. The instructions are available here
baseurl: "http://theplaybook.dev/"
- Update the baseurl in config.yml with your domain. Please note that the HTTPS is enforced through Github Pages
Once the commit for the baseurl change is pushed, the Github Action will run the deploy job and you should be able to access the site via your custom domain. It might take some time for your DNS provider to update your domain and the newly-created records to take effect.